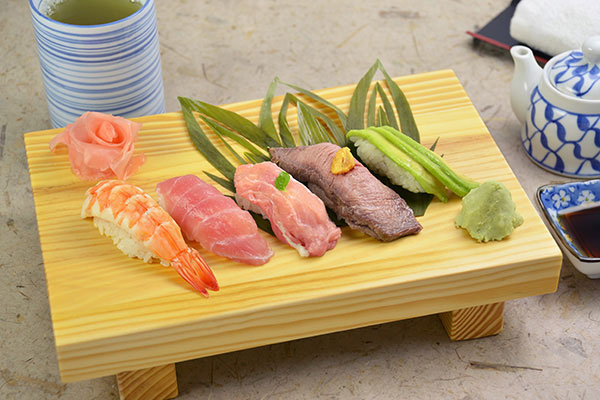
Nigiri Sushi
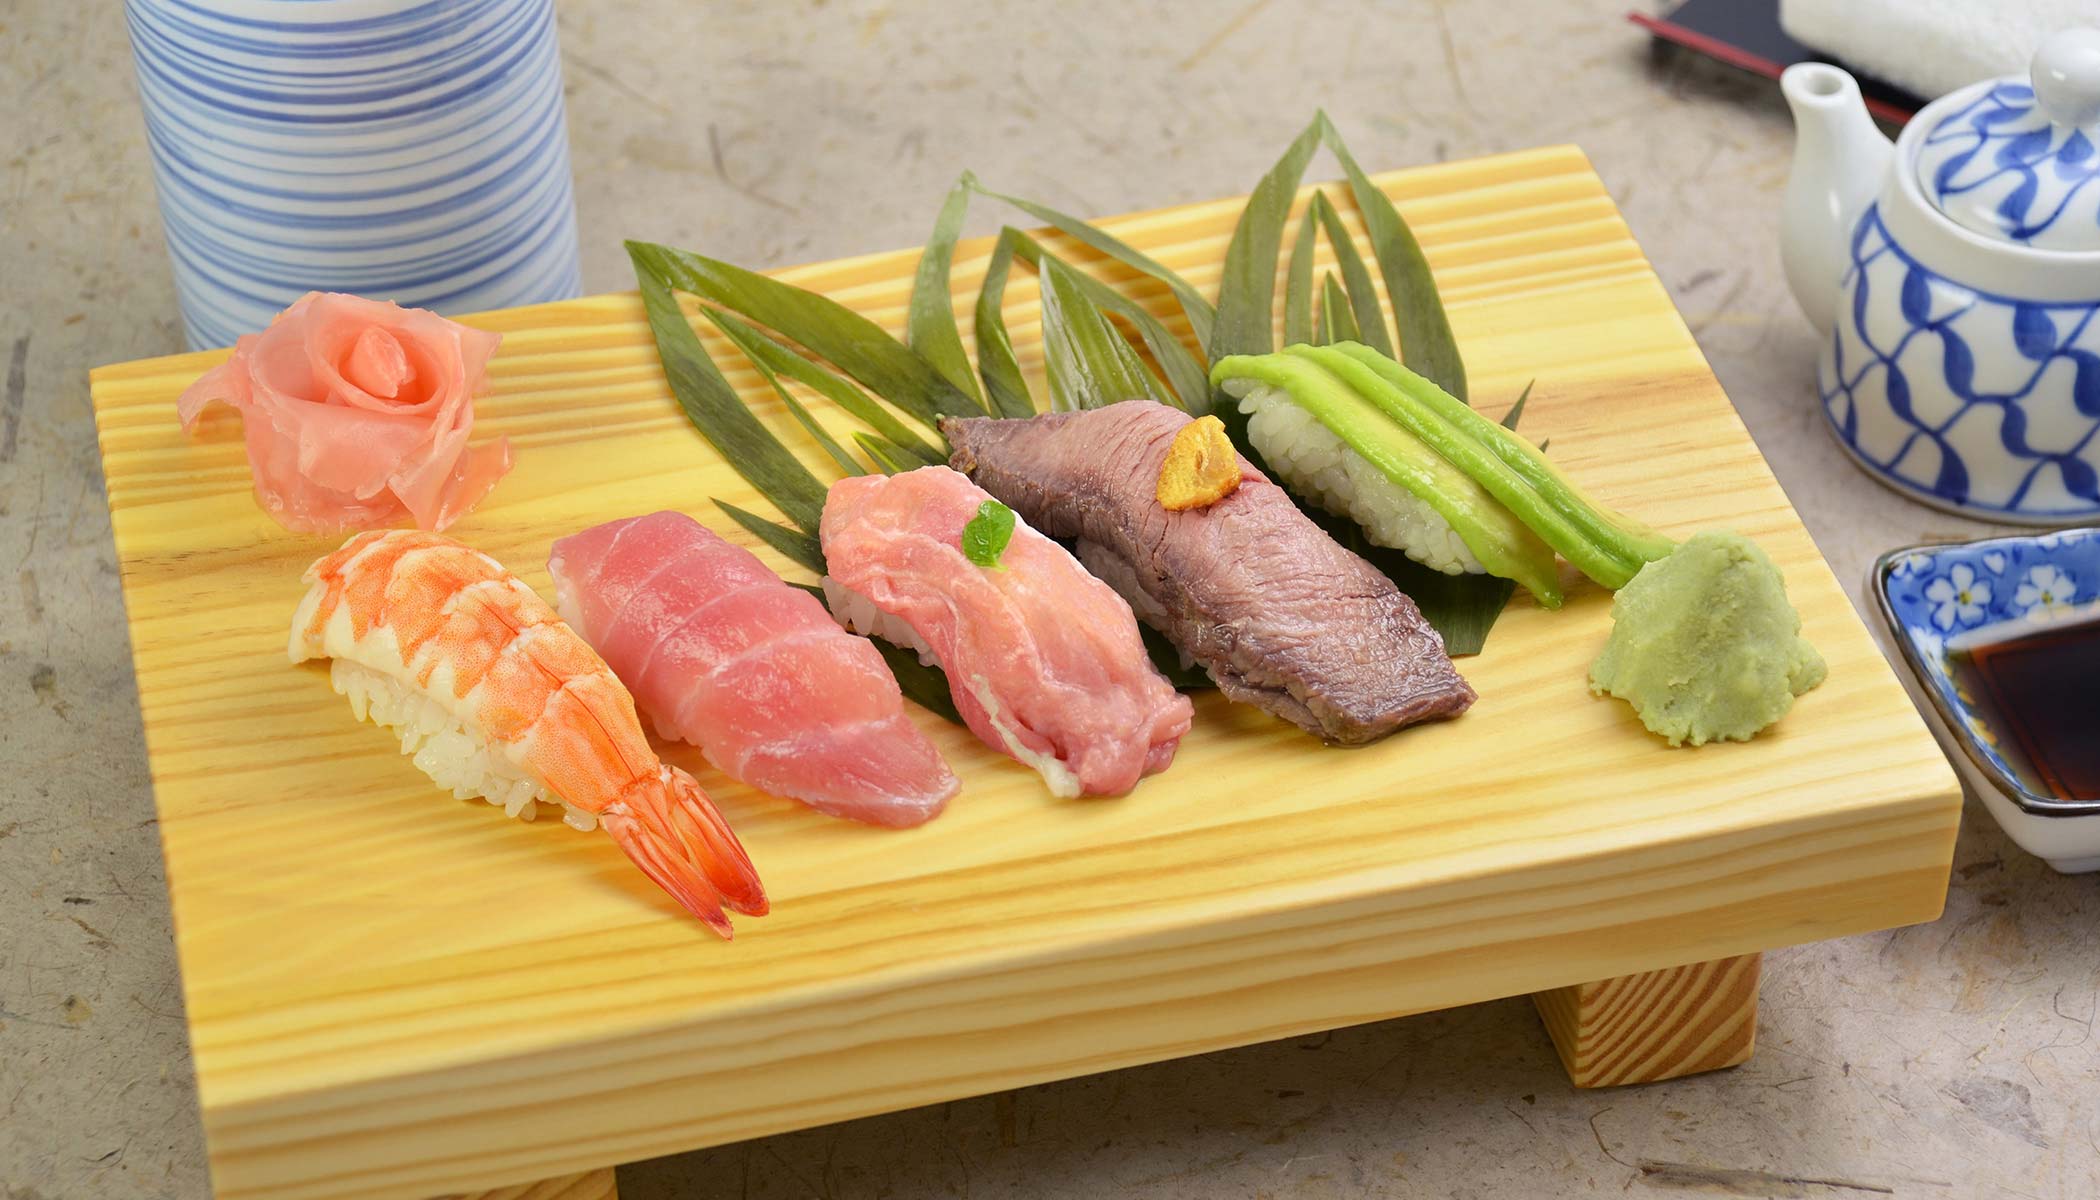
Nigiri is a style of Japanese sushi that was invented in Tokyo during the Edo period (early 1800s). Because it was made with fresh fish caught in Edo-Mae (now known as Tokyo Bay), Nigiri is also called Edo-Mae sushi. There are several ways to make Nigiri (which means to grasp). Here, we will go over the popular Kotegaeshi-style of Nigiri.
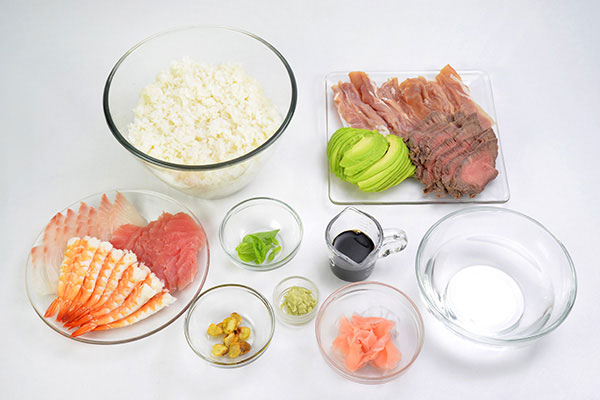
Ingredients (serves 4, makes 48 pieces):
Water to wet hands to prevent rice from sticking:
Garnish and Condiments:
*3 cups raw rice, about 2-lbs. cooked rice
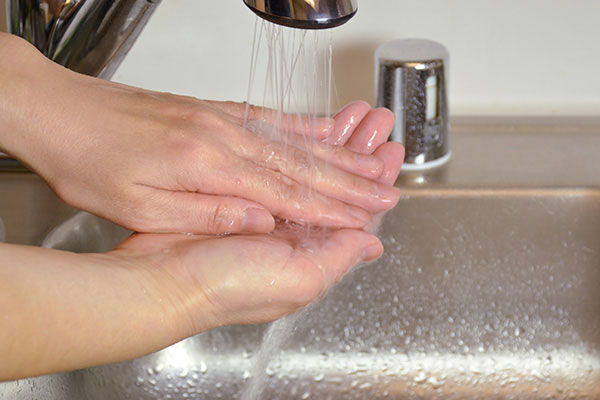
Wash hands thoroughly and prepare a plating dish near you.
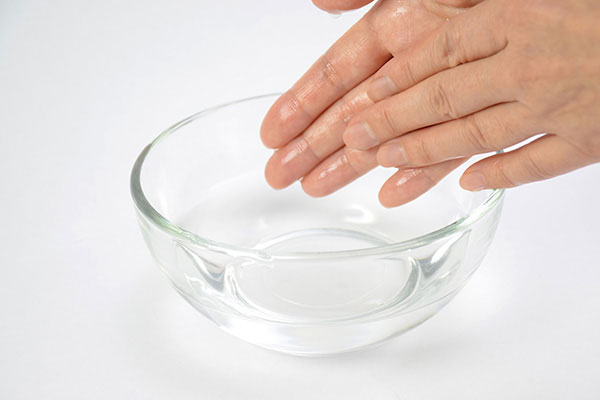
Mix 1 cup of cold water and 1 Tbsp. of rice vinegar in a small bowl. Wet both hands in this hand water.
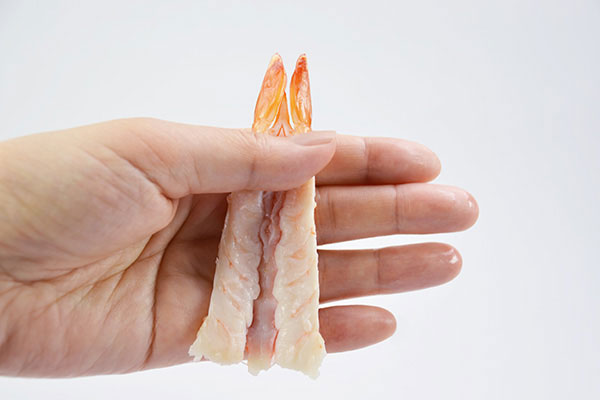
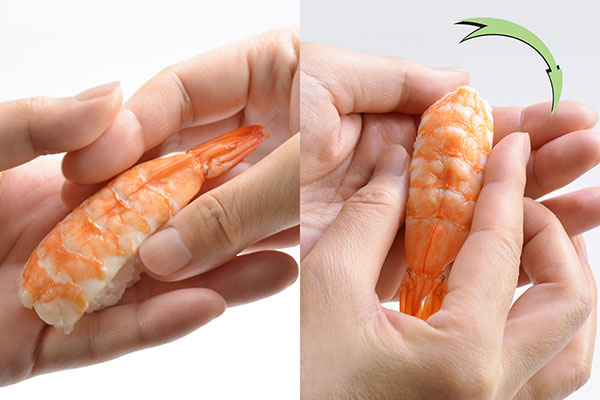
Hold a piece of sliced topping in your left hand and lay flat on your palm.
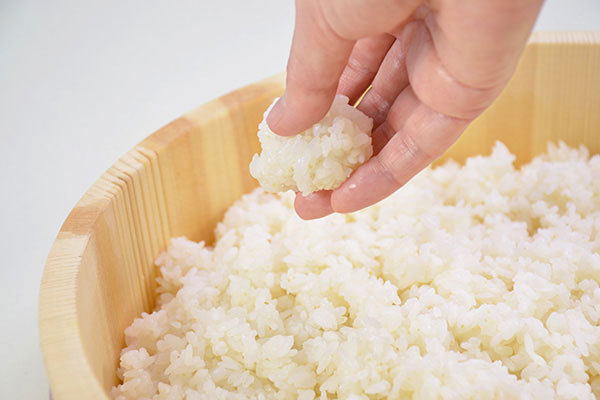
Using the finger tips of your right hand, lightly collect a bite-sized ball of sushi rice (1-1/3 to 2 tablespoons). Do not squeeze the rice.

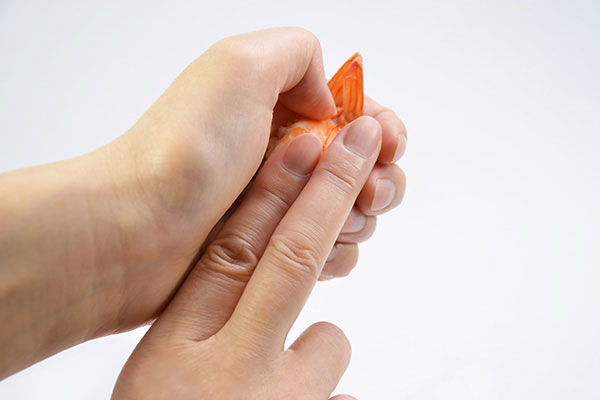
While holding the rice ball in your palm, scoop a tiny bit of wasabi paste with your right index finger.
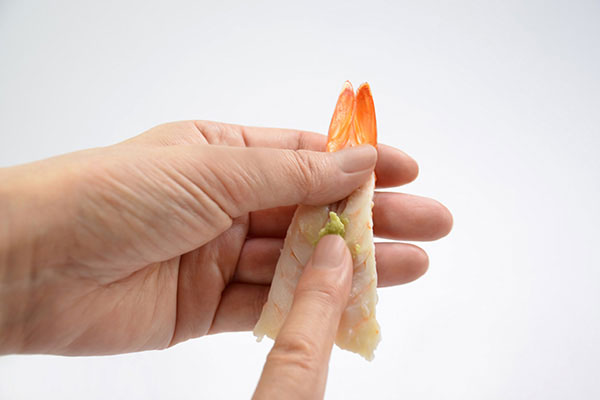
Smear the wasabi on the middle of the sliced topping in your left palm.
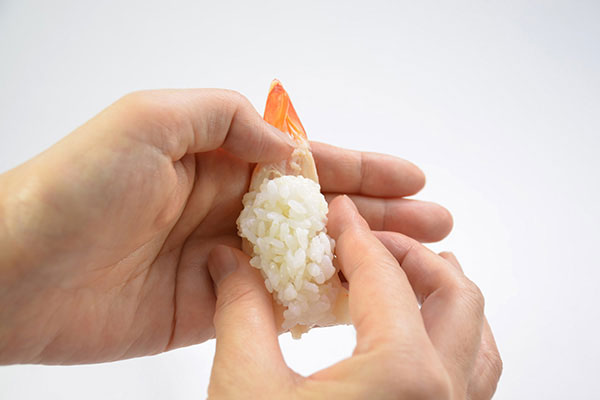
Place the rice ball in your right palm on the topping.
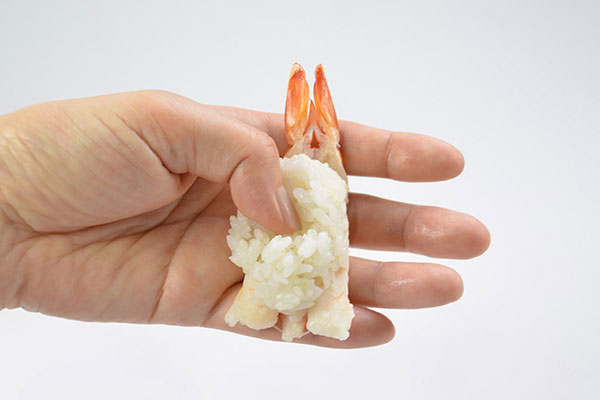
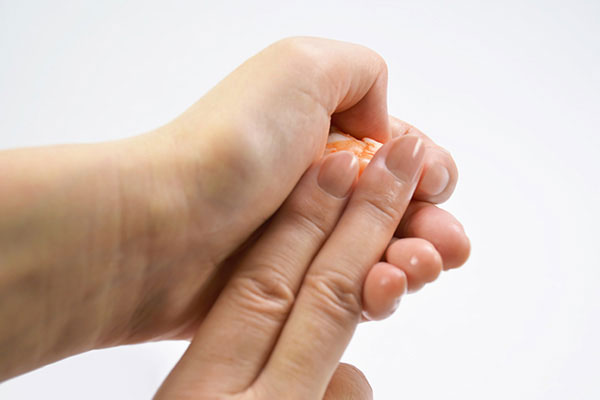
Press the middle of the rice ball with your left thumb, making an indentation. (This helps to keep the rice steady and makes a tiny air pocket in the rice for a fluffy texture).

Roll the sushi on your left hand towards the fingertips to end up with the topping side up.
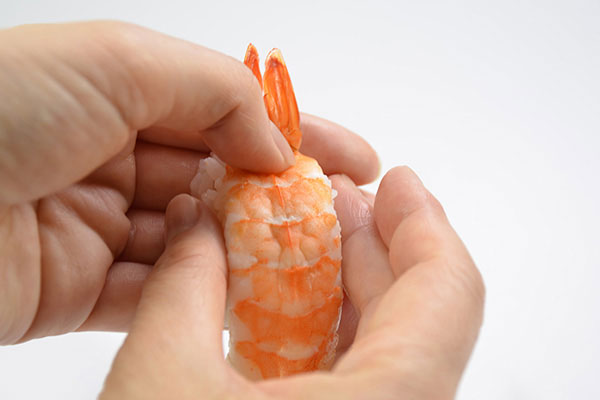
Shape the top edge of the sushi with your left thumb.
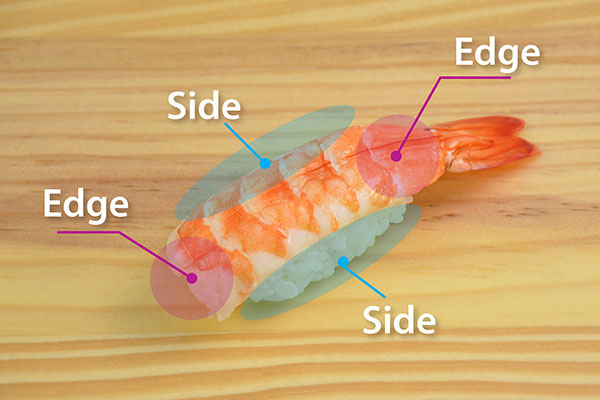
The edge is the shorter side of the sushi.
Without moving your thumb, gently fold your left hand to shape the sushi on the sides, as you use your right index and middle fingers to hold the topping in place. The right fingers are like a lid to the left hand’s mold. Do not use to apply pressure.
Turn the sushi clockwise 180°.
Repeat steps 10-12.
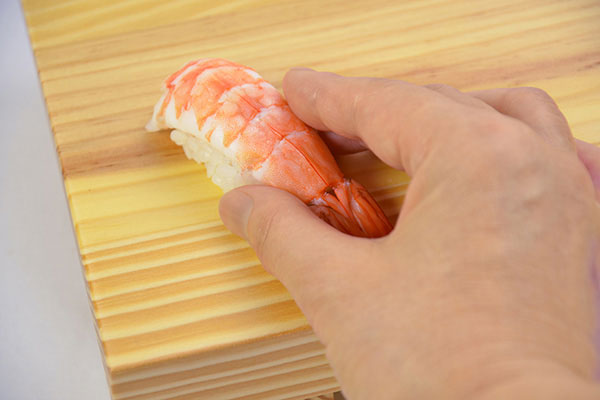
Hold the sides of the sushi with your right hand, and place the finished sushi on the serving plate.
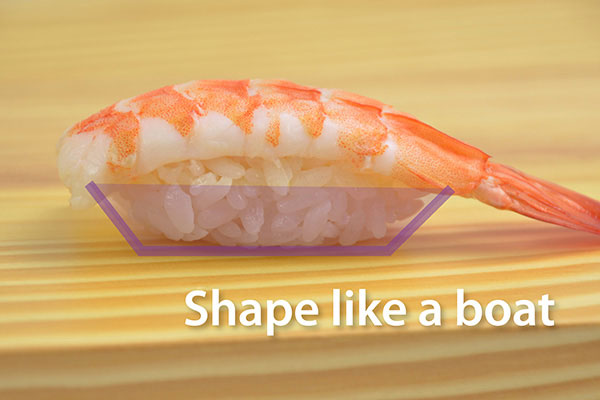
Your sushi rice should resemble a boat when seen from the side.
Serve immediately.
PRINT:


